Deploying Changedetection, an Open-Source Website Change Monitoring and Notification Tool, on ClawCloud
ClawCloud
Section titled “ClawCloud”ClawCloud (also known as “Claw Cloud” or “A Claw Cloud”) is an emerging cloud service provider that primarily offers cost-effective VPS (Virtual Private Server) and cloud-native application deployment platform ClawCloud Run. Their services cover multiple regions, including Hong Kong, Japan, Singapore, Germany, and the United States. Recently, ClawCloud has offered a special promotion:
- $5 monthly free credit for eligible GitHub users (GitHub accounts registered for more than 180 days)
- If your GitHub account is less than 180 days old, as long as it’s over 7 days or you log in with a Google account, you’ll still receive $5 free credit for the first month
Changedetection
Section titled “Changedetection”Changedetection is an open-source website content change detection and notification tool designed to help users monitor website content changes in real-time and send notifications through various channels when changes are detected.
Core Features
Section titled “Core Features”- Website Change Detection: Periodically fetches target website content and compares it with previous versions to identify any subtle changes, such as product price changes, news updates, etc.
- Multiple Notification Methods: Supports sending real-time notifications through various channels including email, Slack, Discord, Telegram, and Webhook, ensuring users can promptly receive website update information.
- Flexible Deployment Options: Supports deployment using Docker or Python environment, allowing users to choose the most suitable method based on their needs.
- Dynamic Website Content Support: Utilizes Chrome browser to extract website content, enabling the capture of dynamically generated content via JavaScript, enhancing support for dynamic websites.
Use Cases
Section titled “Use Cases”- E-commerce Price Monitoring: Monitor product price changes in real-time to catch promotional offers.
- News Update Tracking: Track content updates on news websites to stay informed.
- Government Announcement Monitoring: Monitor changes in government website announcements to stay updated on policy information.
- Website Tampering Detection: Monitor website content for abnormal changes to detect potential security issues.
Deployment Method
Section titled “Deployment Method”Open the ClawCloud Registration Page
-
Log in using
GithuborGoogleaccount authorization- Click to log in using
GithuborGoogleaccount authorization - Click the green
Authorize ClawCloudbutton to authorize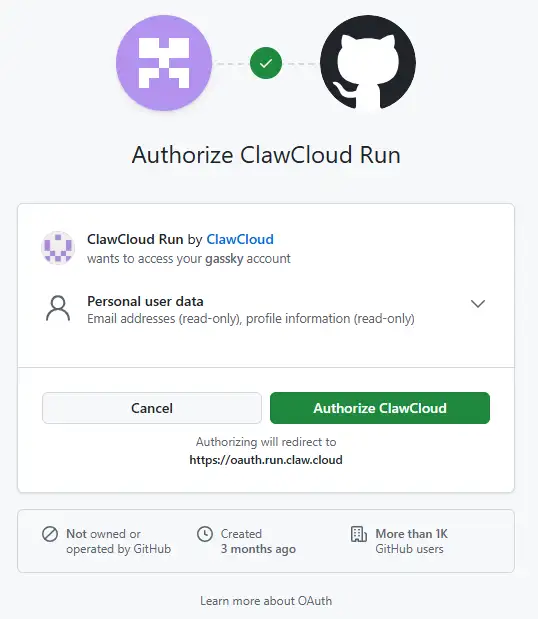
- After successful authorization, you’ll be redirected to the workspace creation page.
Choose a regioncan be selected randomly (can be changed later). Enter a workspace name inCreate Workspace, then click the blackStart Deployingbutton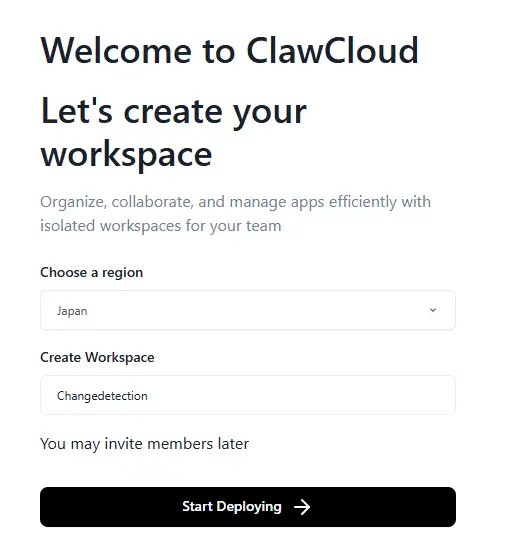
- Click to log in using
-
Deploy the
Dockerfileimage-
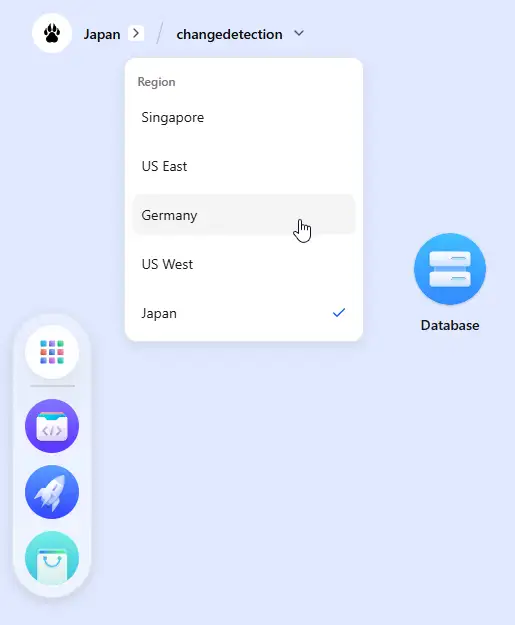
After ClawCloud launched its free service, some domestic “MJJ” users abused it, causing high load on Japanese and Singapore servers. Since we selected “Japan” when creating the workspace earlier, we’ll change it to “Germany” here, as it has the lowest load among ClawCloud’s five free regions
-
Click
App Launchpad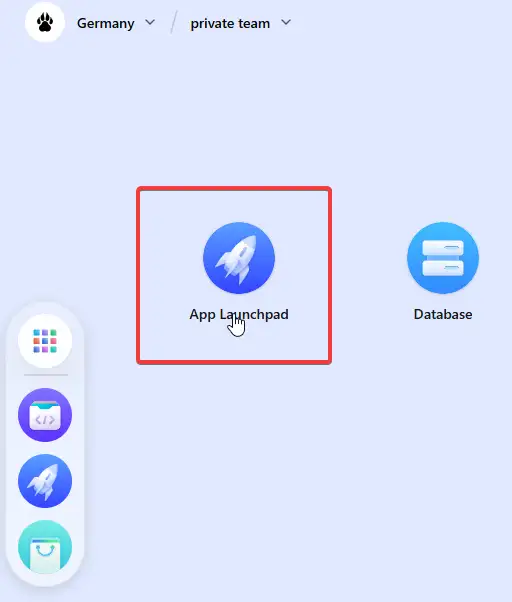
-
Click
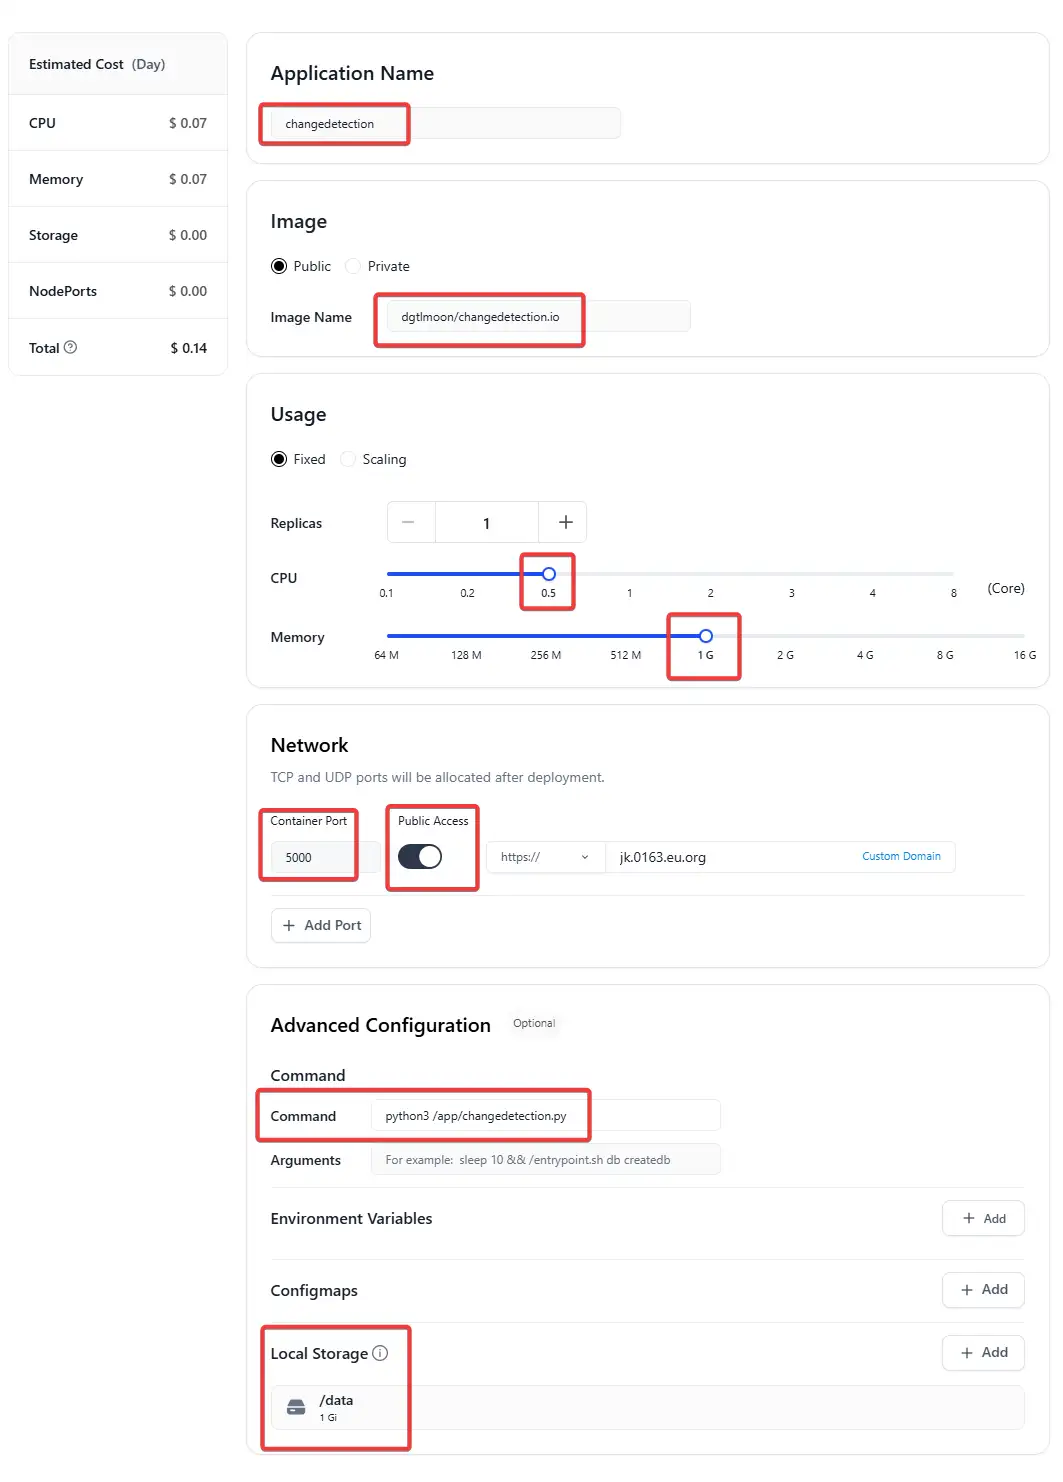
Create Appin the top right cornerIn
Application, enter any name you can rememberIn
Image Name, enterdgtlmoon/changedetection.ioUnder
Usage, select0.5forCPUand1GforMemoryUnder
Network, enter5000forContainer Port, checkPublic Access. If you need a custom domain, clickCustom Domain, enter yourcustom domain, then set up aCNAMErecord pointing to the address provided by ClawCloud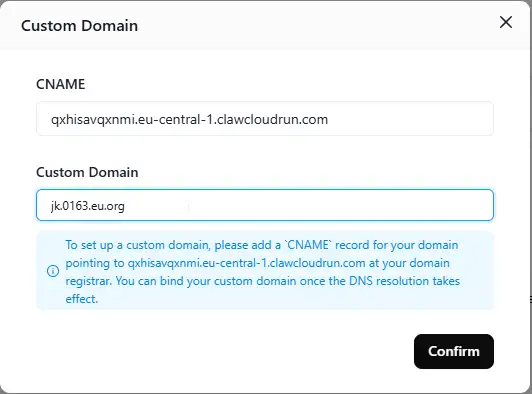
In
Command, enterpython3 /app/changedetection.py.For
Local Storage, click the+ addbutton, enter/datain theMount Pathfield in the popup window, then clickconfirm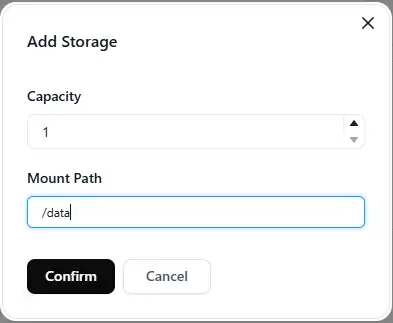
After all settings are complete, it should look like this
-
After completing the settings, scroll to the top of the page and click
Deploy Applicationin the top right corner to create the application. Wait until theCreatingstatus in the top left changes toRunning, and our Docker image will be deployed
-
-
Access
ChangedetectionAfter the Docker image deployment is complete, scroll down to find
Networkand check the status of your custom domain inPublic Address. Once the status changes fromPendingtoAvailable, your custom domain will be accessible